
Introduction
If you’re craving a dessert that’s rich, creamy, and bursting with fruity flavor without heating up your kitchen, this Easiest No-Bake Cherry Cheesecake is your new go-to recipe. Combining the smooth, velvety texture of classic cheesecake with the sweet-tart aroma of luscious cherry topping, this dessert offers a delightful treat that’s as simple to make as it is delicious. Perfectly balanced between tangy lemon and sweet cherry pie filling, every bite melts in your mouth with a comforting richness, making it an instant favorite for family gatherings, casual get-togethers, or anytime you want a fuss-free but impressive dessert.
Prep Time, Cook Time, and Servings
This no-bake cherry cheesecake comes together quickly with minimal hands-on time. Prep time is just 15 minutes, there’s no actual cooking involved, and the cheesecake needs to chill for at least 4 hours or overnight to set perfectly. From start to finish (including chilling), plan for about 4 hours and 15 minutes. This recipe makes 8 generous servings, ideal for sharing.
Ingredients
- 1½ cups graham cracker crumbs
- ¼ cup granulated sugar
- ½ cup unsalted butter, melted
- 8 oz cream cheese, softened
- 1 can (14 oz) sweetened condensed milk
- ¼ cup fresh lemon juice
- 1 tsp vanilla extract
- 1 can cherry pie filling
Step-by-Step Instructions
- Prepare the crust: In a medium bowl, combine the graham cracker crumbs and granulated sugar. Pour in the melted butter and stir until the mixture is evenly moistened. Press this crumb mixture firmly and evenly into the bottom of a 9-inch pie plate, creating a solid crust layer. Set aside.
- Make the filling: Using a hand mixer or stand mixer, beat the softened cream cheese in a large bowl until smooth and creamy with no lumps.
- Gradually add the sweetened condensed milk while continuing to beat until the mixture is silky and well combined.
- Add the lemon juice and vanilla extract, then beat again until the filling is smooth, slightly thickened, and fully incorporated.
- Assemble the cheesecake: Pour the cream cheese filling over the prepared graham cracker crust, spreading it evenly with a spatula to create a smooth surface.
- Cover the pie plate with plastic wrap and refrigerate for at least 4 hours or overnight to allow the cheesecake to firm up properly.
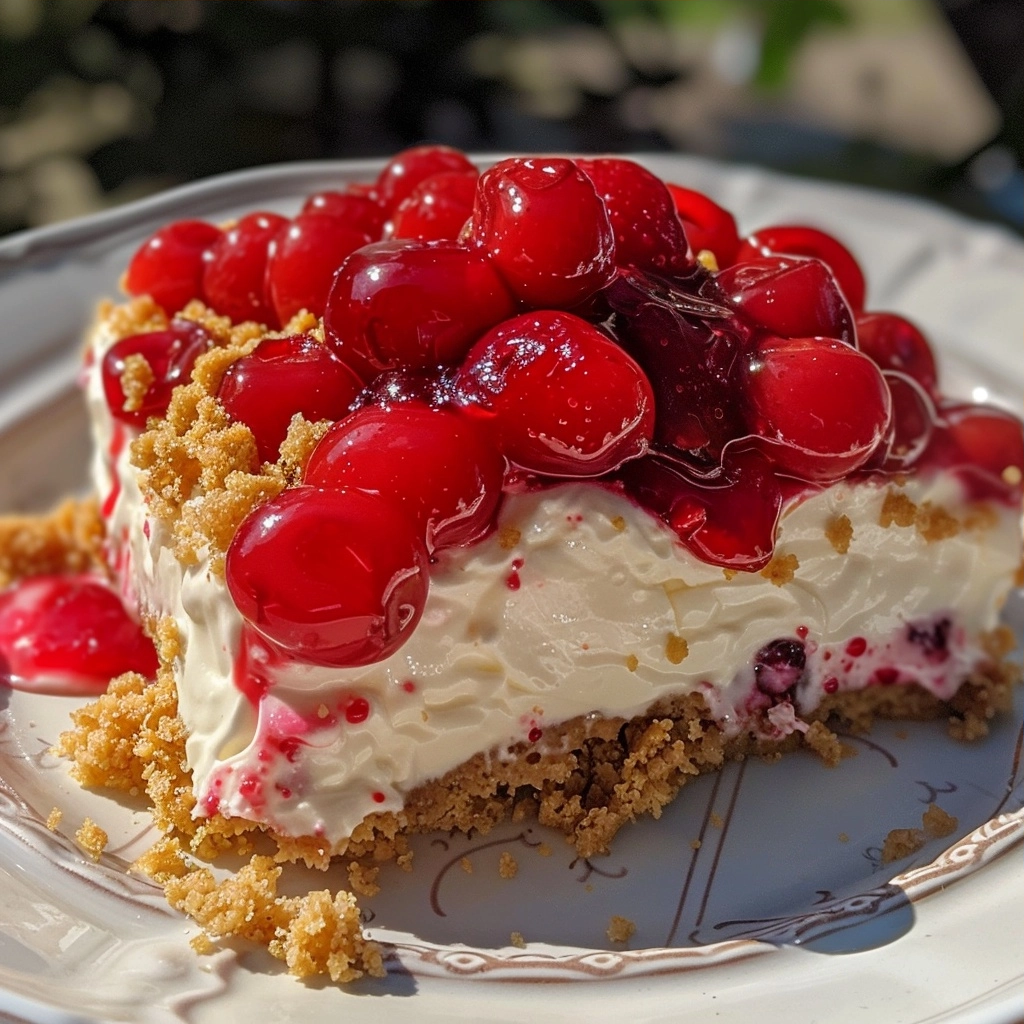
- Add cherry topping and serve: Just before serving, spread the cherry pie filling evenly over the chilled cheesecake layer.
- Slice into 8 pieces and enjoy chilled for the best flavor and texture.
Pro Tips for Perfect Results
- Use room temperature cream cheese: Softened cream cheese mixes more smoothly and prevents lumps in the filling.
- Press the crust firmly: Ensure the crust is tightly packed to prevent it from crumbling when sliced.
- Chill adequately: Refrigerate the cheesecake for at least 4 hours to allow it to set properly for cleaner slices.
- Fresh lemon juice is key: Adds brightness and balances the sweetness effectively. Avoid bottled lemon juice for best flavor.
- Use a serrated knife to slice: For neat, clean slices, dip a serrated knife in warm water and wipe it dry between cuts.
Variations and Substitutions
You can customize this cheesecake to suit your preferences or dietary needs without sacrificing flavor or texture.
- Crust alternatives: Swap graham cracker crumbs for crushed digestive biscuits or vanilla wafers. For a gluten-free option, use gluten-free graham crackers.
- Healthier swaps: Use a reduced-fat cream cheese and substitute sweetened condensed milk with a homemade mixture of evaporated milk and a natural sweetener like maple syrup.
- Fruit topping variations: Instead of cherry pie filling, try blueberry, strawberry, or mixed berry pie fillings for different fruity profiles.
- Flavor boosts: Add a tablespoon of sour cream to the filling for extra tanginess and creaminess.
Storage and Reheating Tips
Store leftover cheesecake covered tightly with plastic wrap or in an airtight container in the refrigerator. It will stay fresh for up to 4 days.
This cheesecake is best served chilled and should not be frozen, as the texture may become grainy upon thawing. If refrigerated for several days, let it sit at room temperature for about 10-15 minutes before serving to soften slightly for optimal flavor and texture.
Frequently Asked Questions (FAQ)
- Can I make this cheesecake in advance?
Absolutely! In fact, chilling overnight is ideal to set the filling fully and deepen the flavors. - What if I don’t have sweetened condensed milk?
You can make your own by simmering evaporated milk and sugar until thickened, but using canned sweetened condensed milk is easiest and provides the best consistency. - Is this recipe suitable for vegans?
This recipe contains dairy products and sweetened condensed milk, so it is not vegan. However, you could experiment with vegan cream cheese and condensed coconut milk substitutes, keeping in mind texture differences. - Can I use fresh cherries instead of pie filling?
You can top the cheesecake with fresh or macerated cherries, but pie filling adds a sweet syrupy glaze that complements the cheesecake’s creaminess nicely. - What if my cheesecake is too soft?
Make sure to chill it long enough—at least 4 hours or overnight. Using cold ingredients and firming the crust by pressing it tightly also helps maintain structure.
Nutrition Estimate Per Serving
Each slice of this easiest no-bake cherry cheesecake provides approximately 350 calories, with 6 grams of protein, 38 grams of carbohydrates, and 20 grams of fat. It’s a balanced indulgence that can fit nicely into a special occasion treat plan.
Get ready to enjoy the luscious creaminess and bright cherry sweetness of this effortless no-bake cheesecake. Whether you’re new to no-bake desserts or simply looking for a quick, crowd-pleasing treat, this recipe is sure to become a favorite in your dessert rotation.

Easiest No-Bake Cherry Cheesecake
Ingredients
- 1½ cups graham cracker crumbs
- ¼ cup granulated sugar
- ½ cup unsalted butter, melted
- 8 oz cream cheese, softened
- 1 can (14 oz) sweetened condensed milk
- ¼ cup fresh lemon juice
- 1 tsp vanilla extract
- 1 can cherry pie filling
Instructions
- Prepare the crust: In a medium bowl, combine graham cracker crumbs, sugar, and melted butter. Press mixture into the bottom of a 9-inch pie plate.
- Make the filling: Beat softened cream cheese until smooth. Gradually add sweetened condensed milk, then mix in lemon juice and vanilla extract.
- Assemble the cheesecake: Spread filling over crust, cover, and refrigerate for 4+ hours.
- Add cherry topping and serve: Spread cherry pie filling over chilled cheesecake. Slice into 8 portions.
Notes
Cherry pie filling can be substituted with fresh cherries
Refrigerate leftovers for up to 3 days