
Introduction to Baked Taco Cups
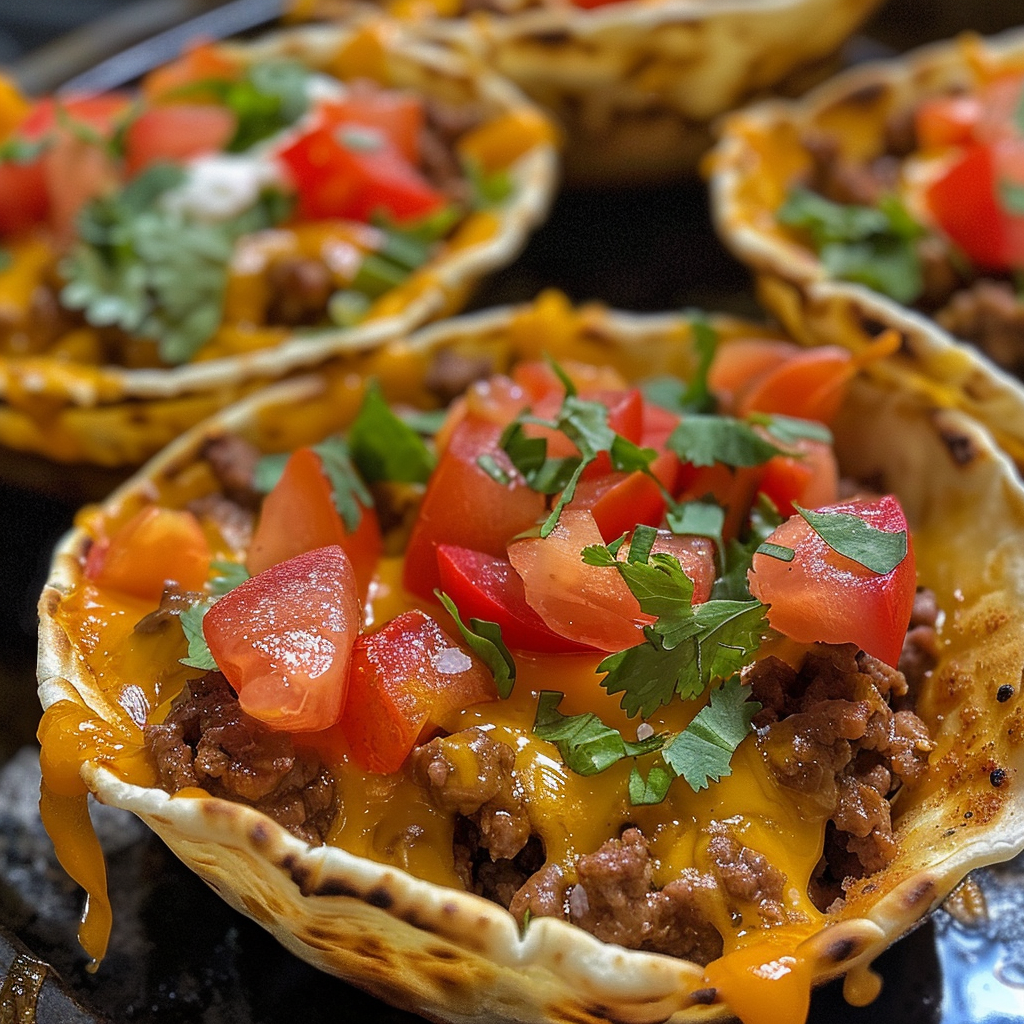
If you love tacos but want an easy, mess-free way to enjoy all the bold flavors, textures, and aromas, baked taco cups are the perfect recipe for you. These bite-sized goodies deliver the classic seasoned ground beef, melted cheddar cheese, fresh diced tomatoes, and a crispy tortilla cup that holds everything together beautifully. The warm, inviting scent of the seasoned beef combined with the crispy golden edges of the tortillas makes this dish irresistible. Whether for a family dinner, party appetizer, or a fun twist on taco night, baked taco cups will quickly become a favorite in your recipe collection.
With each bite, you experience the satisfying crunch of the baked tortilla, the juicy, savory beef filling, and the smooth creaminess of sour cream topping it all off. This recipe is simple to prepare, beginners-friendly, and highly adaptable. Let’s dive into creating your own delicious baked taco cups.
Prep Time, Cook Time, Total Time, and Servings
Preparation for these baked taco cups takes about 15 minutes, with a cook and bake time of around 20-25 minutes. This means you can have them ready to serve in under 45 minutes total. This recipe yields 10-12 taco cups, perfect for serving 4-6 people as a main dish or more as appetizers.
Ingredients for Baked Taco Cups
- 1 lb ground beef
- 1 packet taco seasoning (or 2-3 tbsp homemade taco seasoning)
- 10-12 small flour tortillas (street taco size)
- 1-1½ cups shredded cheddar cheese
- 1 cup diced tomatoes (drained if juicy)
- ½-1 cup sour cream (for topping)
- Optional: ½ cup canned black beans, rinsed and drained
- Optional: ½ cup corn kernels
- Optional: ¼ cup diced onions or jalapeños for extra kick
- Optional: shredded lettuce for serving
Step-by-Step Instructions
- Preheat the oven: Set your oven to 375°F (190°C) and lightly grease a muffin tin to prevent sticking.
- Brown the ground beef: In a skillet over medium heat, cook the ground beef until fully browned. Break it apart with a spatula as it cooks, then drain excess grease carefully.
- Season the meat: Add the taco seasoning packet along with the amount of water specified in the seasoning directions (usually about 2/3 cup). Stir well and reduce heat to a simmer. Cook until the sauce thickens, about 3-5 minutes.
- Prepare tortilla cups: If tortillas are too large, cut them to fit inside the muffin tin cups. Press each tortilla gently into a muffin cup, shaping them to form a cup that will hold the filling.
- Assemble the cups: Spoon a generous amount of the taco meat into each tortilla cup. Sprinkle shredded cheddar cheese over the meat, then add a few diced tomatoes on top.
- Bake: Place the muffin tin in the preheated oven and bake for 10-15 minutes, or until the tortilla edges are golden and crispy and the cheese is melted and bubbly.
- Add final touches and serve: Remove the baked taco cups from the oven and let them cool slightly. Top each cup with a dollop of sour cream and optional toppings like black beans, corn, diced onions, jalapeños, or shredded lettuce for extra flavor and texture.
Pro Tips for Perfect Baked Taco Cups
- Use street taco-sized flour tortillas to ensure a perfect cup size that fits snugly in the muffin tin.
- Drain juicy tomatoes well before adding to prevent soggy cups.
- Make homemade taco seasoning with chili powder, cumin, paprika, garlic powder, onion powder, and oregano for a fresher, customizable flavor.
- Press tortillas firmly into the muffin cups to create sturdy holders that won’t leak filling.
- Add cheese both inside and on top of the cups for gooey creaminess and crispy, golden edges.
Variations and Substitutions
Feel free to customize these baked taco cups to suit your tastes or dietary needs:
- Healthier swaps: Use lean ground turkey or chicken instead of beef for a lighter option. Swap regular sour cream for Greek yogurt to add protein and reduce fat.
- Vegetarian version: Replace meat with black beans, corn, and sautéed peppers. Add extra cheese or vegan cheese as needed.
- Gluten-free option: Use small corn tortillas certified gluten-free.
- Extra veggies: Include diced bell peppers, onions, or jalapeños for more flavor and texture.
- Cheese variety: Experiment with Monterey Jack, pepper jack, or a Mexican cheese blend for different tastes.
Storage and Reheating Tips
Store leftover baked taco cups in an airtight container in the refrigerator for up to 3 days. Reheat them in a preheated oven at 350°F (175°C) for about 10 minutes to restore the crispiness of the tortilla shells. Avoid microwaving if possible, as this can make the tortillas soggy. For longer storage, freeze the fully baked cups in a single layer on a baking sheet, then transfer to a freezer-safe container or bag. Reheat from frozen in a hot oven until warmed through.
FAQs About Baked Taco Cups
- Q: Can I make these taco cups ahead of time?
A: Yes! You can assemble them and refrigerate for a day before baking. Just add a couple extra minutes to the bake time if chilled. - Q: Can I use corn tortillas instead of flour tortillas?
A: You can, but corn tortillas are more fragile and might crack easily. Lightly warming them before shaping helps flexibility. - Q: How do I prevent soggy taco cups?
A: Drain juicy ingredients well and avoid overfilling. Baking until edges crisp helps keep the cups sturdy. - Q: What if I don’t have a muffin tin?
A: You could try using a sturdy cupcake pan or small oven-safe ramekins, but a muffin tin works best for shape and even baking. - Q: Can I add vegetables to the meat mixture?
A: Absolutely! Onions, bell peppers, or corn mix in well and add delicious texture and flavor.
Nutrition Estimate Per Serving
Each serving (2-3 taco cups) contains approximately 280-320 calories, with around 18 grams of protein, 20 grams of carbohydrates, and 15 grams of fat. The protein mainly comes from the beef and cheese, while carbs are contributed by the tortillas and vegetables. Fat content varies depending on the amount of cheese and sour cream used. For a lighter meal, swap to leaner meat and reduce cheese amounts.
These baked taco cups combine convenience, great flavor, and satisfying textures that satisfy cravings without sacrificing ease. Whether a weeknight dinner or a crowd-pleasing party appetizer, this recipe delivers all the ingredients for a delicious taco experience in an exciting new form. Grab your muffin tin and enjoy baking these crunchy, cheesy, and savory taco cups today!

Baked Taco Cups: A Flavorful and Fun Twist on Taco Night
Ingredients
- 1 lb ground beef
- 1 packet taco seasoning (or 2-3 tbsp homemade)
- 10-12 small flour tortillas
- 1-1½ cups shredded cheddar cheese
- 1 cup diced tomatoes (drained if juicy)
- ½-1 cup sour cream (for topping)
- Optional: ½ cup canned black beans, rinsed and drained
- Optional: ½ cup corn kernels
- Optional: ¼ cup diced onions or jalapeños
- Optional: shredded lettuce for serving
Instructions
- Preheat oven to 375°F (190°C) and grease a muffin tin.
- Brown ground beef in a skillet, drain excess grease.
- Add taco seasoning and ⅔ cup water per packet instructions, simmer 3-5 minutes.
- Cut tortillas to fit muffin cups and press into shape.
- Fill each cup with meat mixture, cheddar cheese, and diced tomatoes.
- Bake for 20-25 minutes until tortillas are golden.
- Top with sour cream and optional garnishes before serving.